Sunday, May 31, 2015

Bandsaw Final Speed

As a curiosity, I thought I would check the wheel speed with Dad's handheld tachometer now that I have that new 3/4HP motor hooked up.  That motor had a slightly bigger pulley, so the driven wheel of the bandsaw speeds up.

The manual (dated May 1950) says the driven wheel should spin at 640rpm to produce a band speed of 2050 feet per minute.


Dad's tachometer shows I'm spinning at 700 rpm, so the math tells me I'm running the band at 2250 feet per minute.

I'm justifying this as OK.  Surely, bandsaw blades have improved slightly in the past 65 years, right?  So an increase in 10% shouldn't be bad at all.  It sure cuts nicely, and I'm finding a bandsaw has lots of uses for my oddball projects.

I'm dreaming up all kinds of new projects!


Thursday, May 21, 2015

Band Saw - Nearly Finished!

Well, I'm close to finishing up the whole band saw sha-bang.
I've made slow but constant progress lately:

I have the saw and motor in its final configuration.  I was going back and forth a bit, and finally have things nailed down as to its final position.  The key was getting the very old motor (donated from my ol' buddy Steve-o) to spin in the reverse direction.  There were a ton old wires to sort through, and none of them were the color they were supposed to be according to the nameplate.  So, I blew the circuit breaker a few times, but finally stumbled upon the proper wiring.  

By having the motor run in its new direction, I was then able to place the motor underneath with the bulk of the motor towards the back.  This is good for keeping weight evenly distributed, and not too tippy on one side.  (That crazy old motor must weigh 35 pounds!)


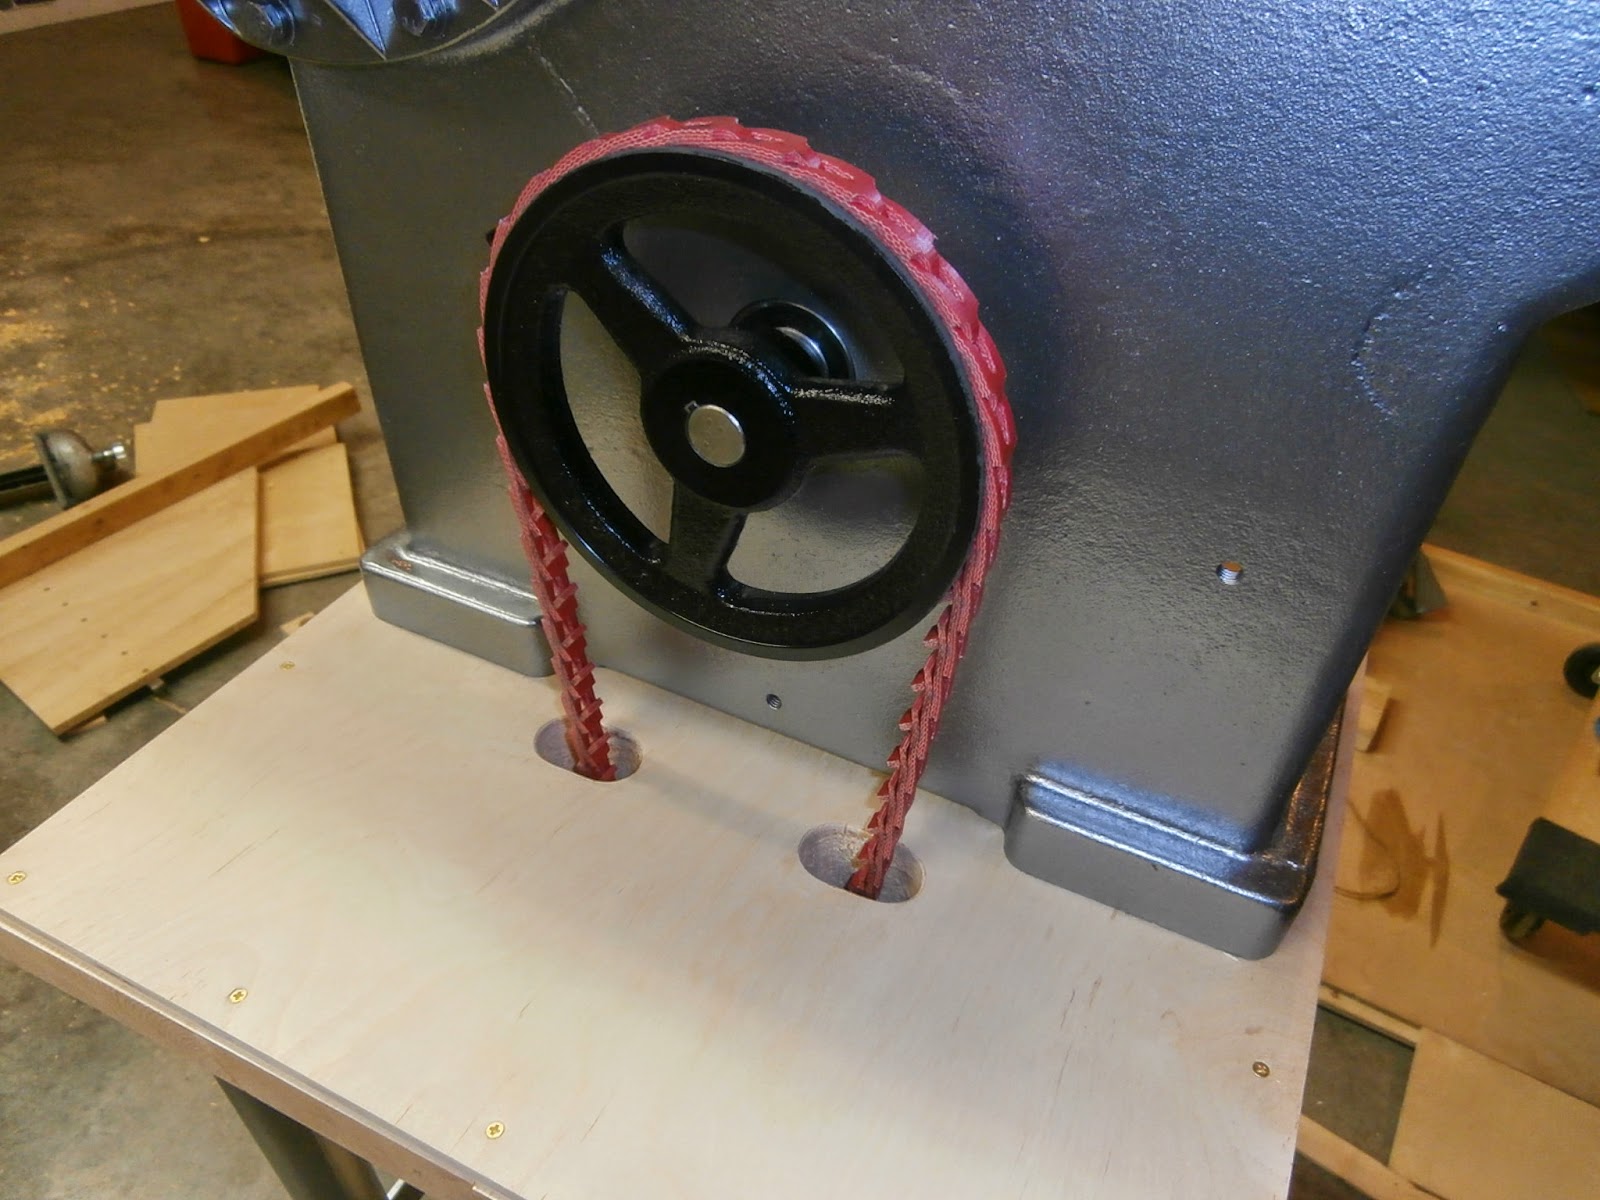
And with the new style linkable V-Belt - the Fenner Drives "Power Twist Plus", I was able to snake it through two small openings in the table.  Try doing that with a normal V-Belt! 

 And lately, I've been prettying up the wood table tops.  Actually, rather than prettying up the old, I just made new.  These tops are stout 2 x 10s with a nice piece of salvaged sanded plywood on top.  You may notice a 3rd table top.  There's one for the top on which the saw sits.  One for the middle for the motor to sit on.  And a bonus one for the very bottom as an auxiliary shelf for other woodworking hand tools.

Tonight, I added a coat of polyurethane 
to make future dust cleanup easier.  

I like the color, too.  

Thursday, May 14, 2015

The Beefed Up Band Saw Table

The table for the band saw always felt a bit rickety.  I also wanted to make it mobile so I could push it away when I'm not using it.  I started with some 1 x 2 x 3/16 rectangular tubing on the CNC mill:

I made some wider support "legs" that can 
accommodate small caster wheels and feet.

This is the finished product:
1.  12mm threaded holes for leveling feet
2.  A large milled spot for locating the legs 
3.  And on the backside, threaded holes for caster wheels

They fit nicely, and I welded them on after a little testing:

After stripping, priming, and painting the table with the addition,
I added the 4 casters and the 4 leveling feet:

A close up:
 It rolls pretty smooth for those small 2 inch casters.
And the feet make a nice a sturdy base.
Now all that is left is to add new table tops!


Wednesday, April 29, 2015

My Boy, the Groundhog

So I'm working on caulking in my newly installed door.  Caulk is tricky stuff.  It takes a steady hand.  And you get pretty sticky after awhile.  So, as I bent down to pick up my damp rag to clean up my hands, my cell phone popped out of my shirt pocket and slid between the crack of the deck and the house.  Oh bummer.


Yup it's down there.  
But also down there are a couple 
of long abandoned groundhog holes.  

Hmmm.  What to do...

It was too tight of a squeeze for me to get under the deck.  
Good thing I have a skinny boy to the rescue!

He has my phone in his hand and he's turned around!

And finally, he's coming out.  


We got him cleaned up and gave him his due reward.

Tuesday, April 14, 2015

Band Saw Restoration - New Pulley!

I ended up buying a new pulley because that old hunk-of-junk pulley wobbled so much.  Buying a new one also allowed me to size it properly to get near the right spindle speed for the driven wheel.  That is, the book says the band wheel should spin at 640 rpm to produce a band velocity of 2050 feet per minute.

My old wobbly pulley was too big and that made the band wheels go too slow - around 500 rpm.  My new pulley is awesome nearly in all ways:
1.  6.25 inch diameter
2.  Cast iron
3.  No wobble

New Awesome Pulley:

But there was one problem - the standard keyway in a pulley for a 0.750 shaft is bigger than what I have on my 0.750 shaft.

The woodruff key in my 0.750 shaft is 0.125 inch, and the keyway in the pulley is 0.187.  So, there's alot of slop.  No problem - off to the machine shop!  I made a "C" shaped shim.  It goes around the woodruff key and fills up the void of the pulley's keyway.

This is a small thing, for sure.  The wall thickness of the "C" is 0.031 inch.  It took a bit of thinking to figure out simply how to hold this in the vice as I machined it.  But, in the end of the day, it fits real cozy as seen below:

While I was at it, I made a new insert for the table.  I made it out of steel, but I am now wondering if I should have made it out of aluminum.  I imagine the steel plate will quickly wear down my teeth if there should be any rubbing.  We'll see how it goes.

So the new awesome pulley is mounted, and the keyway is tight.  I mounted my motor and slung around my new Fenner Drive Powertwist Plus belt.  I'm a big fan of these belts simply because they are adjustable.  If it's a bit too long or short, it's a breeze to change.  I don't have time for multiple trips to get just the right length solid V belt when I mis-measure.

The speed works out nicely, too.  A 6.25" pulley driven by a 2.25" pulley with a 1725rpm motor yields a spindle speed of  621 rpm.  That's pretty close to the specified 640 rpm, so I'm happy.  Turning on the motor to drive the new pulley did produce a slight vibration.  Very slight.  I found the stand is only sitting on 3 of the 4 legs.  I can fix that.  

Friday, April 10, 2015

Wednesday, April 8, 2015

Band Saw Vibration

I've got quite a bit finished on the Atlas 912 Band Saw restoration project.  Lately, I've been working on all the driven components rather than just cosmetic restoration.

I bought new "tires" and installed them onto the wheels.  The new thing is urethane over rubber - they supposedly wear better and work smoother.  The only thing I don't like about them is the pumpkin orange color.  They went on a bit tight, but it was easier than advertised.

I modified the hub from the original roller chain sprocket to fit a large diameter V-belt pulley.  It's nice to be able to use the tools at work for this.  I used the newly acquired CNC mill to drill in a bolt hole pattern.

Then I tapped 1/4-28 fine threads.  I like fine threads because it's easier to tap - - the threads are not as deep.  And the bolt is a slightly larger diameter for more strength.

That hub attaches to the driven spindle shaft, and then I attached my modified V-belt pulley.  The sticker on it shows it's an Allis Chalmers pulley, and it's a bit out true.  While it is concentric, I had no power to straighten the wobble from side to side.  My awesome new Starrett indicator came in handy to show my variance is 0.062 inches.  That might as well be a mile in my world.  I marked the run-out in thousandths of an inch every 15 degrees or so around the perimeter of the pulley.

Here's a close up of that Starrett 196A indicator with it's cantilever rod option in play.  What a great tool.

Regardless of insane pulley wobble, I did install a brand new blade.  It tracks and runs smooth and true on the two wheels.  It should, for new bearings and new tires should make it smooth as silk.

Here's a couple of overall shots of how things stand.


Things to do:
1.  Fix the wobbly pulley, or rather just buy new.
2.  Figure out a better motor mount
3.  Make a center cutout for the table.
4.  Paint the last 2 covers.