While getting my old John Deere 420 spruced up for the spring season, I noticed a slightly loose and wobbly universal joint. This driveshaft is the one that powers the mower deck rather than the hydrostat, so it was pretty easy to get to.
I unbolted the gearbox from the 60" deck and put the whole assembly on the bench to make it easy to work on. At the same time, I drained the gear lube as good preventative maintenance, and will refill it after my u-joint repair.


But, I have the right tools to make a hole for that roll pin.
Enter, the knee mill:
This was a lesson in proper setup. I had to make sure the hole I drill is perfectly perpendicular, perfectly 90 degrees offset from the keyway, perfectly offset from the end of the yoke, and this hole had to go through the center of the bore. It's alot to think about.
Straight up and down isn't a problem - I used a machinist's square:

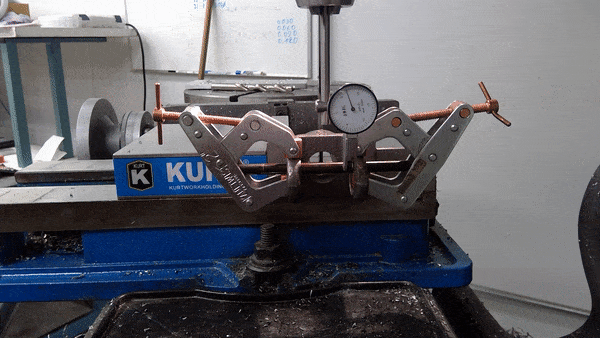
Offset the right distance from the back of the yoke isn't a problem either. And ensuring center of the bore was easy, too. I just used an indicator:

But making sure I was 90 degrees off from the keyway is another matter. How do I make sure that rotational twist is set up?
Assuming the keyway is inline with the cap bearing centers, I clamped a very straight rod across the yoke as such:

With all my dimensions dialed in and set up (about 45 minutes), I started my hole drilling: First off, I like to start with a center drill to keep the hole properly located. Otherwise, drill bits tend to "walk":


So the moment of truth: Do my two different setups produce holes that line up with each other? Yes, they do! I was able to insert my carbide endmill through both holes with a very nice sliding fit. Big sigh of relief.

While I have no pictures pressing on my new bearings and caps, it went OK. I used a manual Drake press rather than a hydraulic press to give me some "feel". I also had a buddy help out (Thanks Steve!). Four hands is much nicer than 2 hands in a job like this.


The last challenge in this whole ordeal was to remove my stuck woodruff key from the gearbox shaft. I stumbled across this idea from the internet - drill and tap the key, and pull out the key by pushing a screw into it. That process worked much better than I thought. I'll use this way from now on.

New woodruff key inserted after the shaft was cleaned up.

And my new yoke and u-joint slid right on. As a bonus, my hole I drilled lined up perfectly for a new roll pin. I'm quite happy with this fix.


I gave it a spritz of black satin paint (close enough to John Deere's Black Blitz paint):


